Recessed downlights have become popular for modern homes and businesses. Energy-efficient lighting solutions are gaining rapid popularity. Items like recessed downlights, particularly canless LED downlights, are leading the charge. According to Fortune Business Insights, the global LED lighting market, valued at USD 70.12 billion in 2022, is projected to reach USD 126.96 billion by 2030, with a CAGR of 7.6%. This growth reflects the increasing preference for LED downlights due to their low energy consumption and long lifespan. Whether undertaking a simple home renovation or a full-scale lighting upgrade, recessed lighting installation offers style and functionality. This guide will helpw with LED downlight installation, focusing on the benefits of canless LED downlights and ensuring a seamless installation process in your space.
Preliminary Safety Steps
Before starting any downlight installation, it’s essential to prioritize safety. Electrical work can be hazardous, so following proper precautions is crucial for efficient recessed downlight installation. Before proceeding with the installation, let’s review the key safety measures.
Turn Off the Wall Switch
The first step in recessed downlight installation is to cut power locally by turning off the wall switch. This ensures the circuit is inactive, making it safe to work with the wiring. It's essential to double-check that the switch controls the power to the area where you're installing the downlight to avoid any mishaps during the process. This initial step minimizes the risk of electrical shock and is crucial for a secure installation.
Shut Off the Main Breaker
For added safety during downlight installation, shutting off the main breaker at the electrical panel is advisable. This will completely isolate the electrical circuit from the rest of the home, ensuring no unexpected power surges occur while you work. It's essential to verify that the main breaker controls the circuit you're working on, which provides an extra layer of protection when performing recessed downlight installation. Taking this step ensures you're completely safe from potential electrical accidents.
Verify with a Voltage Tester
Once you've turned off the power at the breaker and the wall switch, it’s time to confirm that the circuit is completely dead. Using a voltage tester, you can safely check the wires and junction boxes to ensure no current flows through them. ENERGY STAR LED recessed downlights use 70-90% less energy and last 15× longer than incandescents, so providing a safe installation will protect the long-term cost benefits these energy-efficient lights offer. Double-checking with a voltage tester gives you peace of mind and confirms the circuit is safe to handle during installation.
Tools and Materials You’ll Need
With the right equipment on hand, the process becomes more efficient, allowing you to complete the job with precision and safety. In this section, we’ll go over the essential tools and lighting components required to ensure a smooth installation and the materials that will support the long-term effectiveness of your downlights.
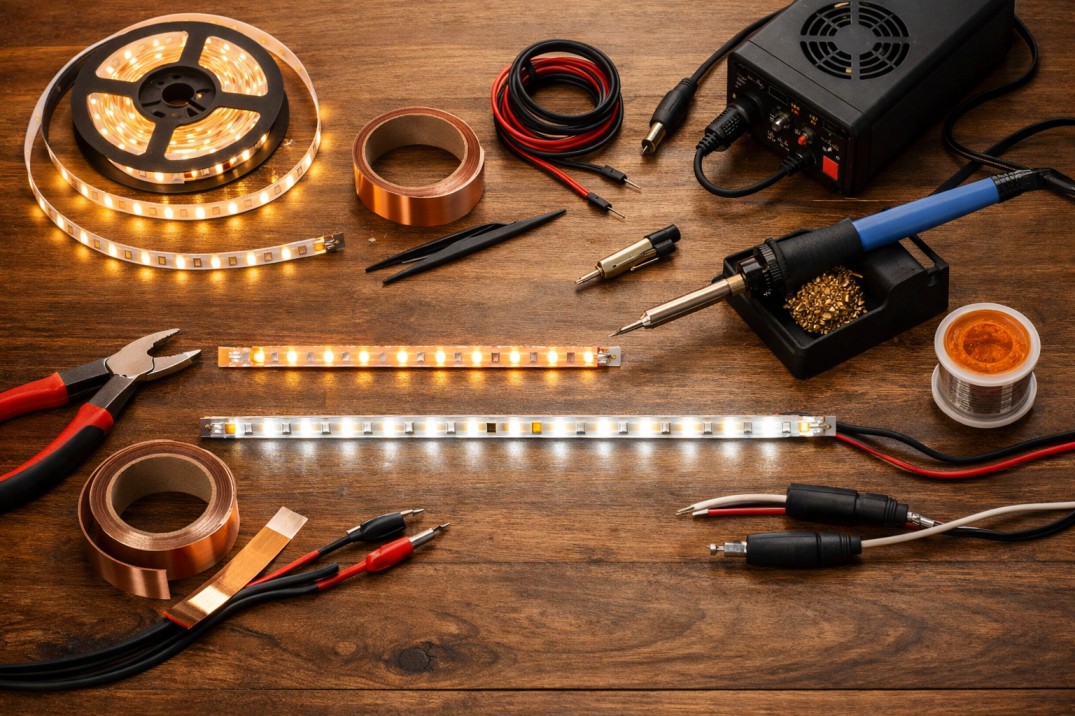
List of Essential Tools
To ensure a seamless recessed downlight installation, you'll need various tools. Essential tools include a saw for making precise cuts, a voltage tester to confirm power is off, fish tape for running wires, a ladder for easy access to the ceiling, a screwdriver, and a ceiling cutout template for accurate hole placement. Having these tools will make the installation process much smoother and safer. Efficient lighting layout spacing can also be achieved when all necessary tools are ready.
Lighting Components
You’ll need the right lighting components for your downlight installation, such as housings, trims, junction boxes, and wiring. Housings ensure that downlights are securely installed within the ceiling structure, while trims provide a polished look. The junction box will house the electrical connections, and the wiring should be carefully installed to ensure safe and efficient energy usage. Remember, lighting accounts for ~15% of global electricity use, but by using LED trim styles and parallel wiring, you can reduce your consumption by up to 80%, as highlighted by the UNEP Enlighten Initiative.
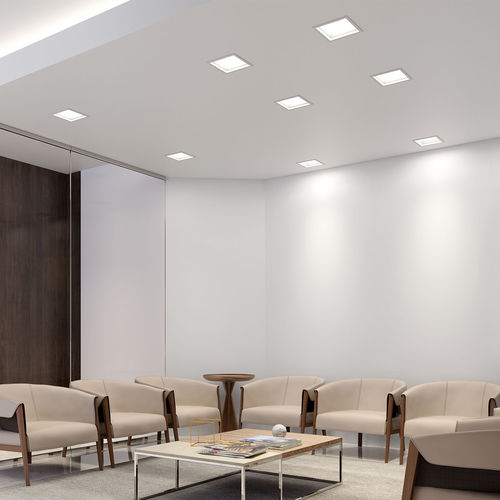
Planning Your Layout and Design
Proper planning is essential for an effective downlight installation. This section will cover how to map out your lighting layout, select the right fixture types, and choose the ideal trim styles to suit your space. These steps will ensure even illumination, aesthetic appeal, and energy efficiency, contributing to a functional and visually pleasing outcome.
Lighting Layout & Spacing
When planning your lighting layout spacing, it's essential to calculate the proper distance between each downlight to ensure even and consistent illumination across the entire room. A general rule is to space the downlights about 4-6 feet apart, which can vary depending on the room size and the lighting effect you want. Proper spacing reduces the risk of shadows and provides optimal lighting coverage. Lighting accounts for approximately 15% of global use of electricity. Opting for LEDs can minimize energy consumption by up to 80%, making it a sustainable choice for any layout.
Fixture Type Selection
When selecting fixtures for your recessed downlight installation, you must choose between IC-rated and non-IC fixtures. IC-rated fixtures are required for areas where the downlight will contact insulation. Additionally, you’ll need to decide whether to go with a can or canless LED downlight. Canless LED options are more flexible and easier to install, while traditional can lights may require more work and space. Choose dimmer-compatible downlights to adjust the lighting intensity for different moods.
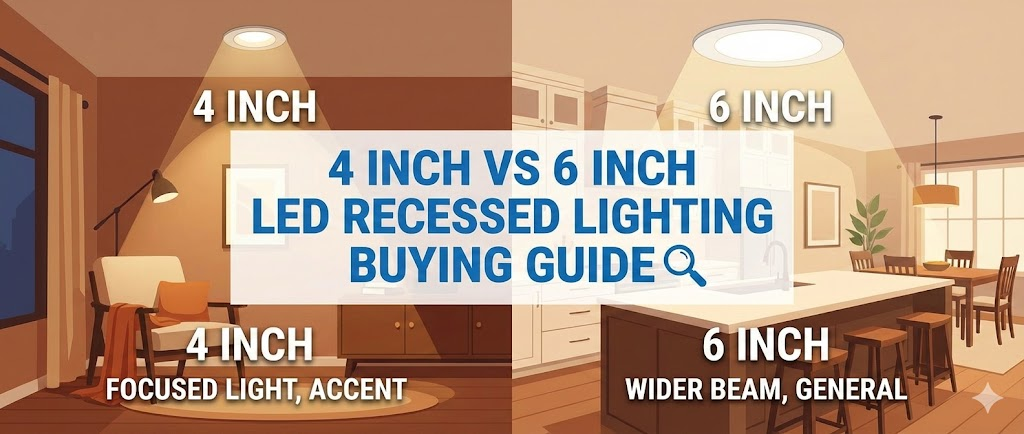
Trim Styles & Beam Angles
Choosing the right LED trim styles and beam angles is key to creating the desired effect in your space. Decorative trim styles come in various finishes and designs, allowing you to complement your home’s aesthetic. The beam angle, which determines the light spread, can also be selected based on your needs—narrow for focused lighting or wide for general illumination. Choosing the correct trim ensures that the downlights blend seamlessly with your interior while providing the perfect lighting distribution for your space.
Step-by-Step Installation Process
A successful installation involves carefully executed steps to ensure your recessed lighting system is safe, energy-efficient, and aesthetically pleasing. This section will guide you through each installation stage, from marking ceiling openings to final testing and adjustments.
Marking and Cutting Ceiling Openings
The first step in your recessed downlight installation is to mark the ceiling openings using a ceiling cutout template. To ensure a proper fit, avoid joists or other obstructions. Carefully cut along the marked lines using a drywall saw, ensuring the hole is the correct size for the housing unit. Keep the ceiling insulation clearance in mind as you cut to avoid damaging any existing insulation. Proper hole placement is essential for optimal alignment and energy-efficient lighting.
Running and Connecting Wiring
Once the ceiling openings are cut, it’s time to run and connect the wiring. The parallel loop-in, loop-out method is commonly used for connecting multiple lights. Start by running 14/2 or 12/2 cable through the ceiling and use fish tape to guide the wire to the appropriate junction box. Ensure that the wire connectors are appropriately secured to avoid loose connections. Always follow electrical safety steps and use a voltage tester to verify that the circuits.
Mounting the Housing or LED Module
Next, mount the housing or LED module securely into the ceiling opening. You’ll use remodel clips for remodel installations, while new-construction installations will require new-construction frames to hold the fixture in place. Ensure the housing is aligned correctly, ensuring the light module sits flush with the ceiling. Double-check the alignment for optimal performance and light quality using bright recessed lights or a CRI high LED downlight.
Installing the Trim
After mounting the housing or LED module, it’s time to install the trim. Depending on your design choice, you can opt for baffles, gimbals, or decorative trims. Secure them in place using the clips or other mounting hardware provided with the trim kit. If you're using a recessed light, adjust the angle to direct it where needed. The correct trim style uplifts the recessed downlight installation's functionality and aesthetic appeal.
Testing and Adjustments
Before finalizing the installation, restore power and test the lights. Use a voltage tester to verify that the circuit and the lights are working correctly. Make all necessary adjustments to make sure of perfect alignment, particularly if your lights feature warm dim technology or a gimbal recessed light with adjustable angles. Testing ensures the fixtures function as expected, providing you with an energy-efficient lighting solution that improves the ambiance of your space.
Wiring Methods Explained
Proper wiring optimizes efficiency of your recessed downlight installation. Understanding wiring methods helps maintain consistent voltage while ensuring the lighting system functions properly. This section will explain key wiring techniques for a safe and effective installation.
Parallel Wiring & Loop-In Loop-Out
The parallel wiring method ensures consistent voltage and even electricity distribution across multiple downlights. You can connect several lights in sequence using the loop-in loop-out technique while maintaining stable power flow. This method reduces voltage drop and minimizes the risk of circuit overload. This in turn, ensure a safe, long-lasting lighting system. U.S. residential lighting consumed ~50 billion kWh in 2022, approximately ~4% of sector consumption.
Dimmer Switch Integration
Integrating a dimmer switch into your recessed downlight installation requires ensuring compatibility with LED dimmers and drivers. LED downlights are often dimmable, but using the wrong dimmer switch can result in flickering or malfunctioning lights. Ensure your LED driver and dimmer switch are compatible, so you can enjoy customized lighting levels while maintaining energy efficiency.
Installation in Existing vs. New Ceilings
When installing recessed downlights, the approach can vary depending on whether you're working with an existing ceiling or a new construction project. Both scenarios require different housing options and installation techniques. Here’s a breakdown of the installation process for each.
Remodel Housing for Existing Ceilings
For existing ceilings, remodel housings with spring-clip designs are ideal, especially when you don’t have attic access. These clips securely attach the housing to the ceiling, allowing you to install recessed downlights without additional space. Remodel housing is perfect for retrofitting an existing space, offering a quick and effective solution for upgrading your lighting system.
New Construction Housing
In new construction, recessed downlight housings are mounted using mounting bars and are typically pre-wired before the drywall is installed. This method enable efficient installation without needing retrofitting. Pre-wiring ensures that everything is ready when the ceiling is closed off, saving time and reducing installation complexity.
Canless LED in Tight Spaces
Thanks to their slim profiles, Canless LED lights are a fantastic option for tight spaces. These fixtures are ideal for shallow plenums where traditional can lights might not fit. Their compact design aids installation in areas with limited space, providing energy-efficient lighting solutions even in the most challenging environments.
Common Issues and Troubleshooting
Like any other electrical work, recessed downlight installations can sometimes encounter issues. Knowing troubleshooting methods for common problems will save you time and prevent frustration. In this section, we’ll address some of the most frequent issues you may face and guide you through resolving them.
Light Flickering or Not Turning On
If your lights are flickering or not turning on, checking the connections first is essential. Loose or improperly connected wires can disrupt power flow, causing the light to malfunction. Additionally, check the driver and ensure it is functioning correctly. If the issue persists, verify that the breaker is turned on and supplying power. Ensuring solid connections will ensure your downlights operate smoothly.
Overheating Problems
Overheating is common with recessed downlights, especially if installed too close to insulation or without proper ventilation. To avoid this, verify that your downlight has the correct IC-rating, ensuring it is safe for direct contact with insulation. Also, check the insulation clearance to ensure proper airflow around the fixture, preventing overheating and potential fire hazards.
Trim Misalignment
Trim misalignment can occur when the downlight’s trim doesn’t sit flush with the ceiling. This is often due to improper installation of spring clips or framing issues. Adjust the spring clips to secure the trim properly, ensuring it sits evenly in the ceiling. If necessary, reposition the framing to align the trim with the ceiling for a more seamless and professional finish.
Energy Efficiency & Cost Considerations
When installing recessed downlights, it’s crucial to consider energy efficiency. This section will help you evaluate the energy consumption of different light types and give you an overview of the financial aspects of installing innovative lighting systems and whether to opt for DIY or professional installation.
LED vs. Incandescent Energy Usage
LED lighting consumes much less energy than incandescent bulbs, substantially saving electricity costs. While an incandescent bulb typically uses 60-100 watts, LED downlights use only 6-15 watts, depending on the fixture. The payback period for investing in LED downlights is often short, making them a wise, long-term choice for reducing energy consumption and electricity bills.
Smart Lighting Options
Bright recessed lights offer improved control and customization through mobile apps. This flexibility can help you save energy by ensuring lights are only on when needed and let you to tailor the lighting ambiance to your preferences. Bright lights are an excellent option for anyone upgrading to more energy-efficient lighting while gaining convenience and control.
Cost Breakdown: DIY vs. Professional
The cost of recessed downlight installation can vary based on whether you choice of DIY approach or hire a professional. DIY installation costs will mainly include the materials (downlights, wiring, etc.), but you may save on labor costs. However, professional installation typically includes labor fees and possibly permit expenses, depending on your location. While DIY may save money upfront, professional installation ensures the job is done safely and to code, preventing potential issues down the line.
Maintenance and Replacement Tips
Regular maintenance and timely replacements are essential to ensure your recessed downlights continue to perform optimally. This section provides helpful tips for maintaining the quality of your downlights and keeping them functioning efficiently. Whether it's replacing LED modules or cleaning trims, proper upkeep add to the longevity of lighting system.
Replacing LED Modules
When replacing LED modules, ensure the power is off to avoid electrical shocks. Carefully remove the existing LED module and disconnect the wiring. Reconnect the new module, ensuring the wires are securely attached. Selecting the appropriate replacement for your downlight is essential to maintain compatibility and efficiency.
Cleaning Trims and Replacing Bulbs
To maintain the quality of your lighting, clean the trims regularly to remove dust and debris, which can reduce light output. Replacing bulbs when necessary helps maintain consistent brightness and light quality. Make sure you are using the right bulb type, as improper replacements can affect your recessed lighting system's overall efficiency and aesthetic.
When to Hire a Professional Electrician?
While DIY enthusiasts can complete many recessed downlight installations, certain situations may require a professional electrician. Hiring a licensed electrician is safe and wise if you’re unsure about code requirements or dealing with complex wiring systems. They will ensure the installation meets local electrical codes and safety standards, preventing potential hazards. Additionally, an electrician can handle more complicated setups, such as integrating innovative lighting systems or ensuring compatibility with existing electrical infrastructure. Always consider professional help when the project exceeds your comfort level or expertise.
Frequently Asked Questions
1. How do you hook up a recessed downlight?
Mark locations, run cable, connect black to black, white to white, and green to ground, secure the housing, install the trim, and test the lights.
2. Do you require an electrician to install LED downlights?
While simple replacements may be DIY, more complex tasks like new circuits, wiring, or safety standards often require a licensed electrician to ensure proper installation and code compliance.
3. What sets apart recessed downlight and downlight?
A downlight directs light downward, while a recessed downlight’s housing sits above the ceiling plane, offering a clean, flush, and hidden appearance for a sleek look.
4. Can recessed lights get installed in an existing ceiling?
Yes, recessed lights is suitable for existing ceiling using remodel housings with spring clips or can-less LED panels. Ensure that joists are located, obstructions are avoided, and IC-rated fixtures are used for insulated ceilings.
5. How should downlights be wired?
Downlights should be wired in parallel using the loop-in, loop-out method. In this method, power is fed to each fixture's junction box in sequence, ensuring proper live, neutral, and ground connections.
6. How do you replace a recessed LED downlight?
Turn off the breaker, disengage spring clips, unplug or disconnect the wiring in the junction box, connect the new fixture wires, secure the clip springs, and test the new downlight.