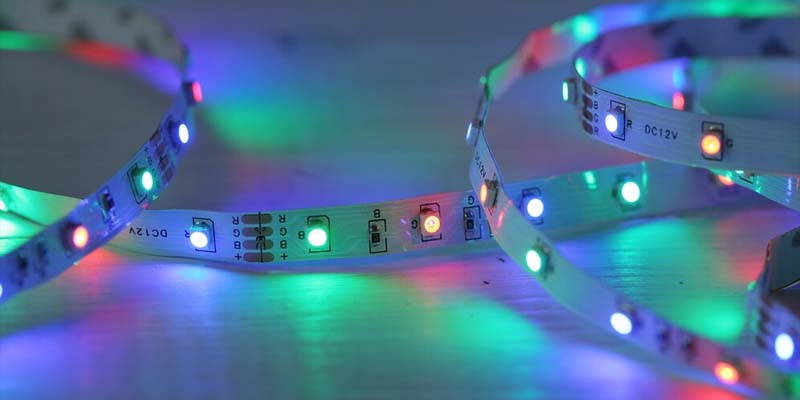
LED strip lights for home and commercial settings, offer a blend of aesthetics and functionality. However, like any electronic device, they can occasionally encounter issues that require a reset. Understanding how to reset LED strip lights, especially without a remote, is crucial for maintaining their performance and longevity. Common problems that might necessitate a reset include unresponsive lights, irregular flashing, or the lights failing to turn on, prompting the question, "Why won’t my LED strip turn on?" Addressing these issues effectively often involves following a few troubleshooting steps. This article serves as a comprehensive LED light strip troubleshooting guide, providing step-by-step instructions to help you resolve these common issues and ensure your LED strip lights function optimally. Whether you're dealing with connectivity issues, faulty controllers, or power interruptions, this guide will assist you in getting your lighting back on track.
Why Do LED Strip Lights Need Resetting?

LED strip lights can experience several issues that may require a reset to restore proper functionality. Some common causes of these problems include:
- Power Interruptions: An unstable or intermittent power supply can disrupt the functioning of LED strip lights.
- Connectivity Issues: Loose or damaged connections between the LED strips and their controller can cause the lights to malfunction.
- Remote Control Problems: If your LED strip lights are controlled by a remote, a malfunctioning or dead remote can prevent proper operation.
- Controller Malfunctions: The controller that manages your LED strip lights may stop working due to hardware failure or improper settings.
- Overheating: LED strip lights can overheat if installed improperly, leading to malfunctioning or a complete shutdown.
- Software or Firmware Issues: Sometimes, outdated firmware or incorrect settings can cause undesired behavior in the lights.
How Resetting Fixes Problems
Resetting LED strip lights is often the most effective solution to various issues. When you perform a reset, you clear temporary faults, return settings to default configurations, and refresh the power cycle. This can resolve connectivity issues, fix the controller, and address software glitches. If you're unsure how to reset LED strip lights, following the manufacturer's guidelines for resetting can help eliminate these persistent problems, bringing your lighting system back to life.
How to Reset LED Strip Lights (Step-by-Step Guide)
Resetting LED strip lights can solve many issues, such as malfunctioning lights, connectivity problems, or issues with the remote control. The process of resetting varies depending on whether you're using a remote and also on the brand of LED strip lights you have. This guide will walk you through how to reset LED strip lights with and without a remote and cover the specific reset processes for popular brands like Philips and Ikea. Following these methods, you can restore your lights to their proper functionality.
With a Remote
If your LED strip lights come with a remote, resetting the lights is often straightforward. Here’s how to do it:
- Turn on the LED strip lights using the remote.
- Hold the remote's reset button for about 5–10 seconds. This should trigger the reset process.
- Check for a color change or flickering: Once the reset is complete, your lights may change color or flicker, indicating that they have been reset to factory settings.
- Test the functionality: Use the remote to check if all functions are working correctly again. If not, try the reset procedure again or consult your user manual for troubleshooting.
Without a Remote
If you don’t have a remote or it isn’t working, you can still reset your LED strip lights manually. Here’s what to do:
- Turn off the power: Unplug your LED strip lights or turn off the switch for at least 30 seconds.
- Plug it back in: After waiting, plug the lights back in or flip the switch back to the "on" position.
- Cycle the power: If there’s a physical switch on the LED strip’s power supply, turn it on and off quickly. This can trigger the reset.
- Test the lights: After performing the power cycle, check if the lights usually function. If the issue persists, try this process again or refer to the product manual for alternative reset steps.

Different Brands (Philips, Ikea, etc.)
LED strip lights from different brands may have specific reset instructions. Here’s how to reset LED strip lights from popular brands like Philips and Ikea:
Philips Hue:
- Turn on the lights using the physical switch or app.
- Hold the power button on the light switch for at least 10 seconds until the light blinks or flashes. This indicates that the lights have been reset to factory settings.
- Use the Philips Hue app to reconnect the lights to your network after the reset.
Ikea TRÅDFRI:
- Turn on the light using the switch.
- Press and hold the button on the control device for 10 seconds until the light starts flashing.
- Reconnect the lights to the Ikea TRÅDFRI gateway or app for further adjustments.
For brands like LIFX, Govee, and more, the general reset process involves turning off the power, wait about 30 seconds, and then turning it on while holding a button or cycling it multiple times.
Troubleshooting LED Strip Lights
LED strip lights are much coveted for home and office lighting, but they can sometimes malfunction like all electronics. Whether your LED strip lights are not turning on, flickering, or displaying color-changing issues, troubleshooting is often necessary to identify the cause. This section will cover common problems and solutions to restore your LED lights to full functionality. Let’s look at the most frequent issues and how you can resolve them.
LED Lights Not Turning On
One of the most frustrating issues is when your LED strip lights are not turning on. If you’re experiencing this problem, there are several potential causes to consider:
- Check the power source: Ensure the outlet or switch functions and the power supply is connected correctly. A loose connection could prevent the lights from turning on.
- Inspect the controller: If you're using a remote or app to control the lights, check that the controller is working and correctly paired.
- Examine the LED strip: Damaged strips or broken connections can prevent the lights from illuminating. If this is the case, replacing the affected strip or repairing the connections may be necessary.
Addressing these issues promptly is essential to fixing LED strip lights that are not turning on and restoring their full functionality.
Flickering or Color-Changing Issues
Flickering or color-changing LED strip lights can be annoying, but fortunately, they are usually easy to fix. If you're wondering how to fix flickering LED strip lights, start with these standard solutions:
- Check the power supply. Insufficient or inconsistent power can cause flickering. Make sure the power supply can support the full load of your lights.
- Review the connections. Loose or damaged wiring can cause color-changing or flickering issues. Secure all connections and replace any faulty cables.
- Reset the lights: If the issue persists, try resetting the lights to their default settings, as described in the previous section. This removes any software or configuration problems causing the issue.
These steps should help resolve flickering or color-changing problems and restore smooth operation to your LED strip lights.
Power Supply & Wiring Problems
Power supply and wiring issues are among the most common causes of LED strip light malfunctions. If your LED strip lights are malfunctioning, consider these possible problems:
- Inadequate power supply: If the power supply is too weak for the length of your LED strips, it may not provide sufficient power, causing flickering or failure to turn on.
- Wiring issues: Poor wiring or damaged cables can cause lights to cut out or malfunction. Ensure all wiring is intact and connected.
- Overloaded circuit: Too many devices on the same power circuit can cause voltage drops, which can affect the overall performance of your LED strip lights.

Why Do LED Strip Lights Stop Working?
LED strip lights are durable and has long lifespan, but may stop working for various reasons. Here are some common causes of malfunction:
- Power Supply Failure: If the power supply is malfunctioning or is not providing enough voltage to the LED strip, the lights can stop functioning.
- Wiring Issues: Loose, damaged, or improperly connected wires can interrupt the flow of current preventing the light from turning on.
- Controller Malfunctions: A faulty or malfunctioning controller can prevent the LED strip lights from responding to input, causing them to stop working.
- Overheating: LED strips can overheat if installed improperly or in areas with poor ventilation, leading to damage or failure.
- Burnt-out LEDs: LEDs have a lifespan, and over time, individual LEDs can burn out, causing parts of the strip to stop working.
How to Fix LED Strip Light Remote Issues
It can be frustrating if your LED strip lights aren't responding to the remote control. Here's how you can fix common remote control issues:
- Check the Batteries: If your remote isn’t working, the batteries might be dead. Replace them and try again.
- Repair the Remote: If the remote is not syncing with your lights, it may need to be repaired. Refer to the manufacturer’s instructions for resetting and re-pairing the remote with the strip.
- Clear Obstructions: Ensure no obstacles block the infrared signal between the remote and the sensor on the LED strip.
- Check the Receiver: If the remote still isn’t working, check the sensor on the LED strip for any dirt or damage. Clean it gently and see if that resolves the issue.
- Reset the System: In some cases, resetting the remote and the LED strip can fix connection problems. This can often be done by turning off the lights, waiting a few seconds, and then turning them back on.

Best LED Strip Light Brands & How to Reset Them
Several brands stand out for their quality and reliability regarding LED strip lights. Philips offers innovative lighting solutions, offering easy-to-use LED strips with strong connectivity options. Ikea provides affordable and durable LED strips that integrate well into home setups. Havells offers high-quality LED strips that are energy-efficient and long-lasting. ShopMurphy is known for providing flexible, customizable options for various lighting needs. To reset LED strip lights from these brands, follow the specific reset procedures outlined in the user manual, typically involving power cycling or a remote control.
FAQs
1. How do you reset LED strip lights without a remote?
To reset LED strip lights without a remote, unplug them for at least 30 seconds, and again plug back in. Alternatively, cycle the power using the physical switch several times quickly. This often resolves issues like unresponsiveness or malfunctioning lights.
2. Why are my LED strip lights flickering?
An inadequate power supply, loose wiring, or poor connections may cause flickering LED strip lights. Other reasons could include an incompatible controller, outdated software, or overheating. Ensuring a stable power source can help resolve flickering issues and restore regular operation.
3. Can I reset the LED strips with my phone?
Yes, if your LED strip lights are connected to an innovative app like Philips Hue or Govee, you can reset them through your phone. Open the app, navigate to the settings, and look.
Wrapping Up
In conclusion, understanding how to reset your LED strip lights can help you solve common issues like unresponsiveness, flickering, and color inconsistencies. Whether resetting with a remote or without or troubleshooting specific brand-related problems, following the rpropersteps can get your lights back to their optimal performance. If you’re looking for high-quality LED strip lights and accessories, BuyLEDOnline offers a wide selection of reliable products for all your lighting needs. Check out our collection today and find the perfect LED strips to brighten your home or business.


