Installing a dimmer light switch is a great way to uplift the ambiance and functionality of your home lighting. Dimmer switches let you to adjust the brightness as needed, creating a customizable atmosphere for any occasion. A dimmer switch can be the perfect solution, whether aiming to add a bit of romance to your dining room, reduce glare in your workspace, or simply save on energy costs. Installing a dimmer switch is straightforward, with clear steps that even novice DIYers can follow. By understanding "How to Install a Dimmer Switch," you can take control of your home's lighting needs and create a more comfortable, responsive environment. In this introduction, we’ll learn about the benefits of dimmer switches and set the stage for a successful installation, ensuring that you feel prepared and informed.
Tools and Materials Needed
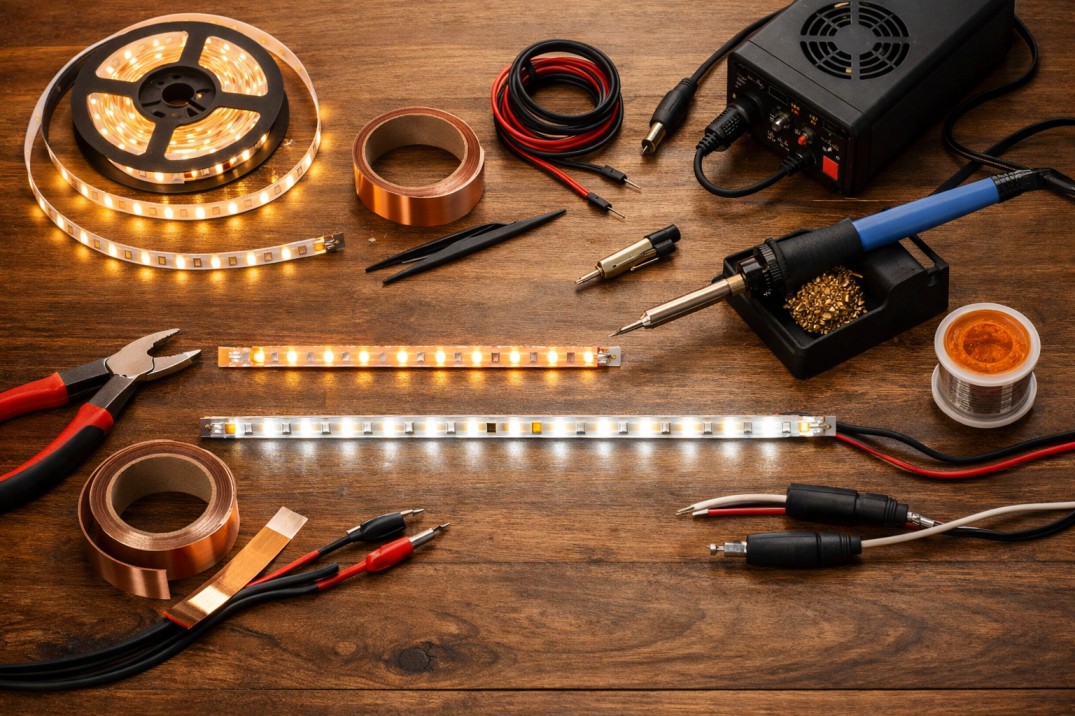
When preparing for the task of installing a dimmer switch, gathering the right tools and materials is crucial for smooth and safe installation process. Here’s a comprehensive list to get you started:
- Screwdrivers: You'll need both flathead and Phillips head screwdrivers to remove the existing switch and secure the new dimmer switch.
- Wire Strippers: These are crucial for safely exposing fresh wire without damaging the conductors.
- Voltage Tester: Before installation, a voltage tester must confirm the power of the switch circuit.
- Dim is oofferSwitch: There are several dimmer switches, including rotary, slide, toggle, and smart dimmers. Choose one that best fits your needs and aesthetic preferences.
- Wire Connectors: You’ll need appropriate wire connectors to connect the wires securely.
- Electrical Tape: This is used to cover connections for added safety.
- Wall Plate: If your new dimmer switch comes with a wall plate or if you want to update the existing one, have it ready for installation.
It's also important to consider the compatibility between your dimmer switch and the light bulbs you are using. Not all dimmers work with all bulbs- for instance, LEDs require compatible dimmers that can handle low electrical loads without flickering or buzzing.
Dimmer Switch Wiring Guide
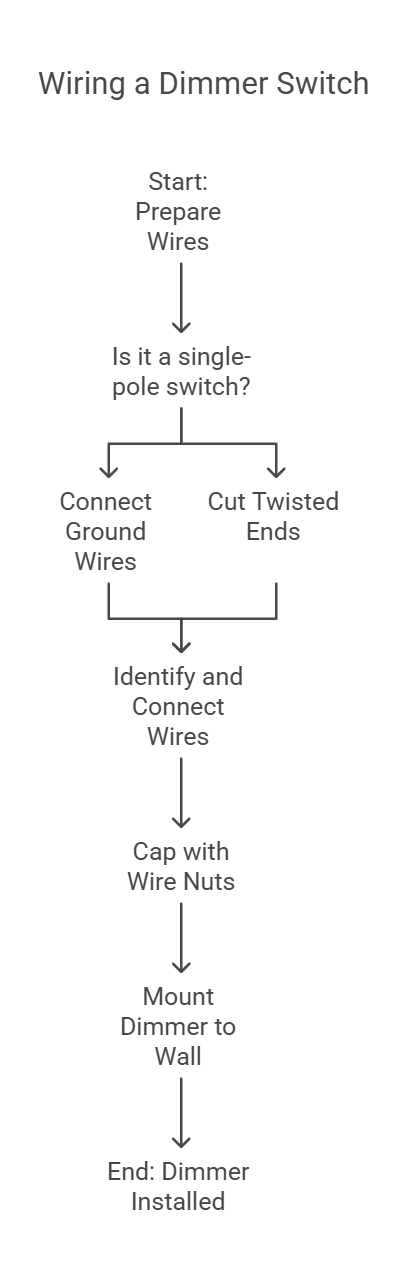
Correctly wiring your dimmer is crucial to ensure it functions correctly and safely. Typically, the installation involves connecting the in-house wires to the dimmer switch wires: usually one black (live) wire, one white (neutral), and a green or bare copper (ground) wire. Always refer to the manufacturer’s wiring diagram for specific instructions.
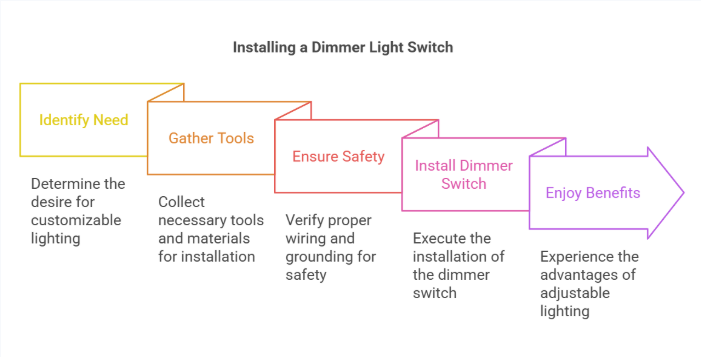
Step-by-Step Installation Instructions
Installing a dimmer switch for LED lights can significantly improve your home's ambiance and energy efficiency. Here’s a detailed, step-by-step guide to help install a dimmer switch for the first time and ensure a smooth and successful upgrade.
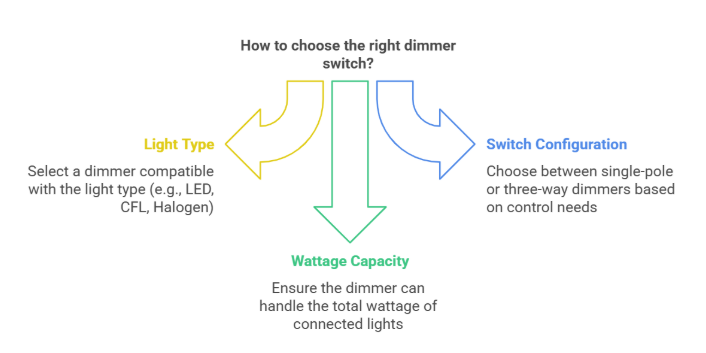
Choose the Right Dimmer Switch
Selecting the appropriate dimmer switch is crucial for compatibility with LED lights. LEDs require dimmers capable of handling their unique electrical characteristics to operate efficiently without issues such as flickering or buzzing. Verify the dimmer’s compatibility with your specific type of LED bulb before purchase to ensure optimal functionality.
Turn Off Power
Prioritize safety by turning off the power at your home’s circuit breaker before starting work. This precaution prevents accidental electric shocks and ensures a safe installation environment. Confirm that the entire area is de-energized using a voltage tester.
Remove Existing Switch
Begin by removing the switch cover plate with a screwdriver. Then, unscrew the actual switch from the electrical box and gently pull it out, taking care not to disrupt the existing wiring. Use a voltage tester on the wires to double-check any remaining electrical current, ensuring the area is safe for work.
Disconnect Wires
Carefully examine and note how the existing switch is wired- snapping a photo can be a helpful reference. Disconnect the wires from the old switch by loosening the terminal screws. This step prepares the wiring for connection to the new dimmer switch.
Connect the New Dimmer
Follow the manufacturer's wiring diagram to attach the wires from the wall till the dimmer switch. Typically, connect the black (live) wires to the dimmer's corresponding terminals, the white (neutral) wire to its respective terminal, and the green or bare copper (ground) wire to the ground terminal.
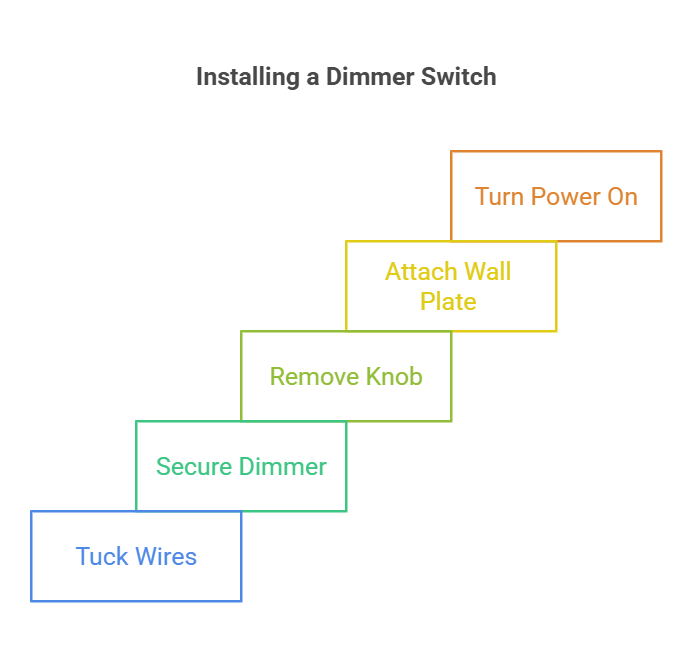
Secure the Dimmer Switch
After connecting the wires, carefully align the dimmer switch inside the electrical box and secure it with screws. Ensure it is mounted firmly and the wiring is neatly arranged to prevent any pinching or undue stress on the wires.
Attach the Faceplate
Once the dimmer switch is secured, place the new faceplate over it and fasten it with screws. Ensure the faceplate is aligned correctly and sits flush against the wall, giving your installation a clean and professional appearance.
Restore Power and Test
Get the power back by turning on the circuit breaker. Test the newly installed dimmer switch by adjusting the brightness of the connected LED lights. Confirm that the dimmer functions smoothly across different light levels, ensuring it operates as expected without any issues.
Safety Precautions
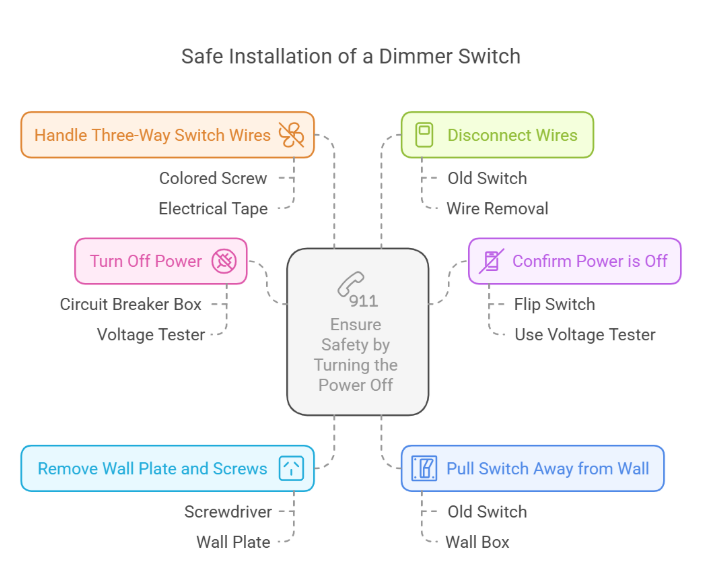
When embarking on the task of installing a dimmer switch, prioritizing safety is paramount. Here are essential safety tips to follow to ensure your installation process is both safe and successful:
- Confirm Power is Off—Always start by turning off the power at the fuse box in the area where you will be working. This prevents the risk of electric shock.
- Use a Voltage Tester- Before handling wires, use a voltage tester for checking live current in the switch's wiring. This is a critical step even after you've turned off the power.
- Handle Tools with Care—To avoid accidental injury, handle all tools, especially wire strippers and screwdrivers, carefully.
- Check Wire Conditions—Inspect the existing wires for signs of wear or damage. Frayed or damaged cables can be hazardous and should be replaced or insulated adequately before proceeding.
- Follow Manufacturer Instructions- Always adhere to the manufacturer’s guidelines for your specific dimmer switch model, especially when connecting wires and mounting the switch.
Troubleshooting Common Issues
Installing a dimmer switch can sometimes lead to issues that need troubleshooting. Here are solutions for some common problems you might encounter:
Dimmer Not Working with LED Lights
Make sure that the dimmer switch is compatible with LED bulbs. Not all dimmers can handle LEDs' low wattage without issues.
Flickering Lights
Flickering can occur if the dimmer switch isn't designed for the type of bulbs you're using. Check compatibility between your bulbs and the dimmer model. Sometimes, using a different brand or type of LED can resolve flickering issues.
Buzzing Sound
A buzzing sound from the dimmer or bulbs usually indicates an incompatibility between the dimmer and the light bulbs. Opt for dimmer switches specifically designed for LED technology to reduce or eliminate buzzing.
Dimmer Fails to Adjust Light Levels Smoothly
If the lights do not adjust smoothly, the dimmer may be overloaded. Ensure that the total wattage of the lamps does not exceed the dimmer’s capacity. Also, some dimmers come with an adjustment wheel or slider on the side or back to fine-tune the minimum brightness level.
Additional Tips
Several advanced tips and product recommendations can significantly uplift your installation and overall lighting experience when installing a dimmer switch. Here are some insightful suggestions:
- Fine-Tuning Dimmer Settings: Many modern dimmer switches feature adjustable settings that let you fine-tune the minimum and maximum brightness levels. This can be especially helpful in avoiding issues like flickering at lower light levels. Look for a slight adjustment dial or screw on the dimmer switch that you can tweak to get the desired performance.
- Wiring Configurations for Multi-Way Switches: If your setup includes multiple switches controlling the same light (such as in a hallway), you may need a special dimmer designed for 3-way or 4-way configurations. Ensure that all switches in these setups are compatible with the dimmer’s functionality to maintain consistent performance across all control points.
- Neutral Wire Considerations: Some advanced dimmer switches require a neutral wire for proper installation, especially in smart home setups. If your existing switch box does not have a neutral wire, you might need to run an additional wire or choose a dimmer model designed to work without one.
Product Recommendations
For those looking to uplift their dimmer switch installation with high-quality compatible bulbs, consider exploring the options available at Buy LED Online. This retailer offers a diverse selection of LED bulbs known for their excellent dimming capabilities and compatibility with various dimmer switches. Whether you need bulbs that provide warm, soft light for a cozy atmosphere or brighter, more vibrant lights for a functional workspace, Buy LED Online has options to suit every need. Their LEDs are designed to offer smooth dimming transitions without flickering, making them a reliable choice for your dimming solutions. Additionally, shopping from Buy LED Online ensures you have access to energy-efficient bulbs that can help reduce your electricity bills while providing the adjustable lighting flexibility you desire.
FAQs
1. Can any light bulb be used with a dimmer switch?
Every light bulbs are not compatible with dimmer switches. Before connecting them to a dimmer switch, it’s essential to check if your bulbs are dimmable. Incandescent and halogen bulbs are typically inherently dimmable, while many LED bulbs must be labeled dimmable. Using non-dimmable bulbs with a dimmer can lead to operational issues such as flickering, buzzing, or even premature bulb failure.
2. How do I know if my dimmer switch is compatible with my LED lights?
To ensure compatibility, check the specifications on both the LED bulb and the dimmer switch. The dimmer should state whether it supports LED bulbs and what minimum and maximum load it can handle. Some manufacturers provide a list of tested bulbs and fixtures that are known to work with their dimmers. Using a dimmer and bulbs that are not compatible can result in suboptimal performance and even damage.
3. What should I do if my lights flicker using a dimmer switch?
Flickering lights when using a dimmer switch can be caused by several factors. First, ensure your bulbs are dimmable and compatible with the dimmer switch. If compatibility is confirmed, try adjusting the dimmer's built-in settings, if available, to reduce flickering. Some dimmers have adjustment dials or switches that allow you to set the minimum load level, which can stabilize light output. If the problem keeps happening, consult a professional electrician to ensure your wiring and fixtures work correctly.
Wrapping Up
Installing a dimmer switch is easy yet impactful way to improve the ambiance and functionality of your home's lighting. By selecting the correct dimmer switch, ensuring compatibility with your light bulbs, and following detailed installation instructions, you can achieve a customized lighting environment that suits your needs and preferences. Whether you're looking to create a cozy atmosphere or reduce energy consumption, the flexibility provided by dimmer switches is invaluable.
Ready to upgrade your home lighting? Visit Buy LED Online today to find the best dimmable LED bulbs that perfectly complement your new dimmer switch. Start improving your lighting experience now.
Check out Our Products:
LED Bulbs: https://buyledonline.com/led-bulbs.html
LED Tubes: https://buyledonline.com/led-retrofit-tubes.html
Residential LED Lighting Fixtures: https://buyledonline.com/led-lighting-fixtures.html
Office/Commercial LED Lighting Fixtures:
https://buyledonline.com/led-commercial-lighting-fixtures.html
LED Panel Light Fixtures: https://buyledonline.com/led-panel-light-fixtures.html
LED Recessed Downlight Lighting: https://buyledonline.com/recessed-lighting.html
LED Track Lighting Fixtures: https://buyledonline.com/track-lighting-fixtures.html
LED Solar Lighting Fixtures: https://buyledonline.com/solar-lighting-fixtures.html